

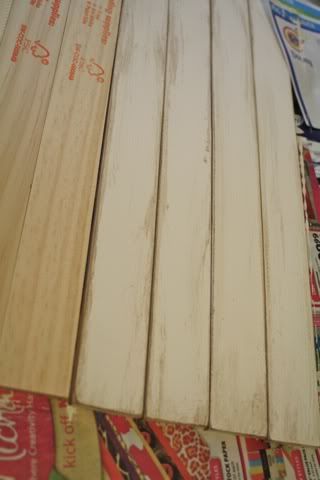
1. Go to your local Home Depot or Lowes and beg for some {5 Gallon} Paint stirrers. They may look at you like your crazy or they may be super helpful like guy at our Home Depot down the street. Most the time they're happy to give you however many you need. For this project I used 7, with an 8 1/2 x 11 metal sheet. (OR if you're embarassed to ask you can buy some at wal-mart I believe) Go home and cut them to whatever size you want and give them a fresh coat of paint. I chose Glidden's antique white (I love that they will give out samples periodically, and they last forever!) *of course you can change the dimensions all you want to make it larger or smaller. I just love that you can buy pre-cut magnet board for $1!

2. After I let my paint dry, I sanded and glazed each stick like so...
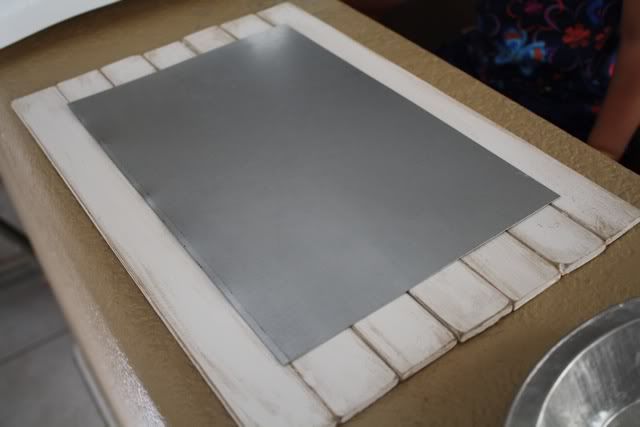
3. Next, I hot glued in between each paint stick and then put hot glue allll over the back of the magnet sheet and stuck that on. I figure between all that glue it should hold right?? If you're nervous maybe use some gorilla glue instead?
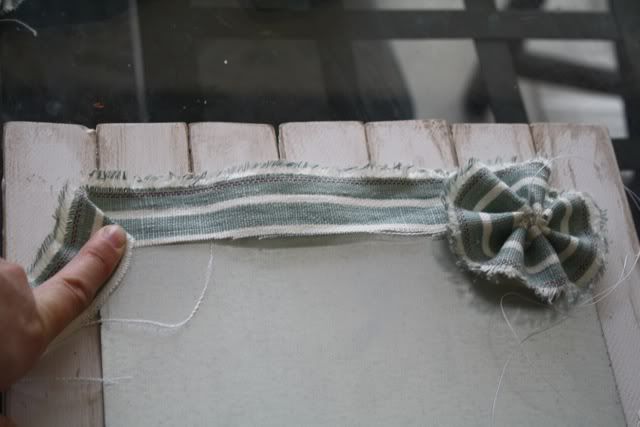
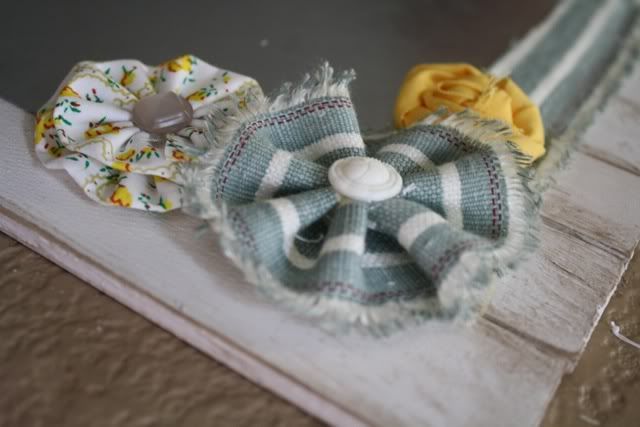
4. Then I felt like it needed some jazzing up (haha sometimes I use words that sound like an 80 yr old woman. Not that that's a bad thing...) So, I decided to add some fabric around it. This is great because it uses all those scraps I save! I LOVE when I actually find uses for them. So, I started out with one long strip of the blue and white striped fabric. I hand stitched and pulled until I got the rosette look I was going for. Then glued the flower down with the end of the fabric running along the edge. At the corner I just folded and hot glued until I got the look I wanted.
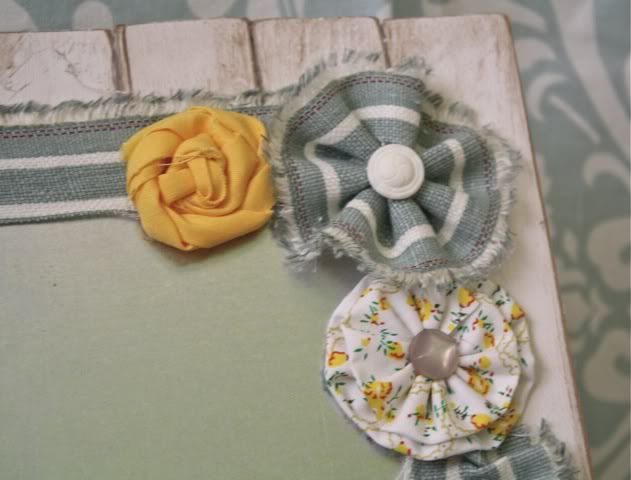
5. Keep gluing your fabric down until you run out. Which in my case was too early. OOPS! I probably should have measured, but if you know me at all you know I don't measure anything. So instead of worrying about the huge space of missing fabric, I added some more flowers for fun :)
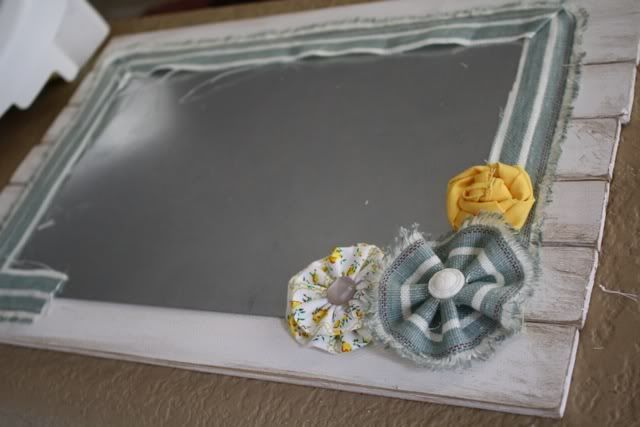
6. My husband came home and I proudly showed him my magnet board. He kindly asked why I stopped the fabric so early? haha I told him I had a plan...I did it on purpose?? Of course the answer is always a ruffle in my house so I added a ruffle and I actually like it better! Adds character right?
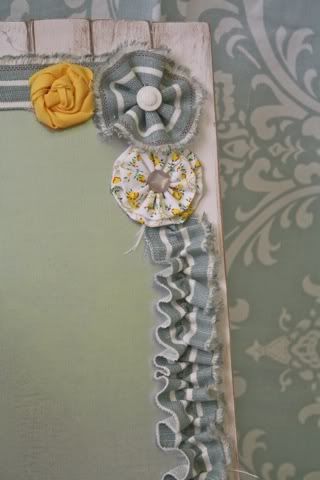
7. Here's the finished product! Even if I didn't have all of the stuff on hand I think this would only cost about $3. I love adding things to my home for next to nothing that serve a purpose.

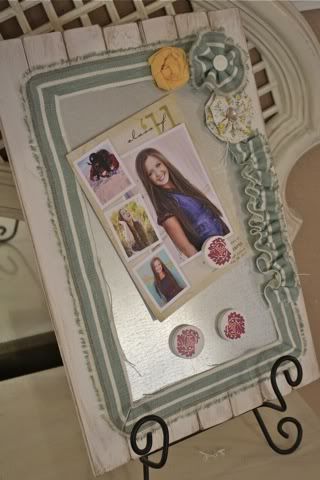

3. Next, I hot glued in between each paint stick and then put hot glue allll over the back of the magnet sheet and stuck that on. I figure between all that glue it should hold right?? If you're nervous maybe use some gorilla glue instead?

4. Then I felt like it needed some jazzing up (haha sometimes I use words that sound like an 80 yr old woman. Not that that's a bad thing...) So, I decided to add some fabric around it. This is great because it uses all those scraps I save! I LOVE when I actually find uses for them. So, I started out with one long strip of the blue and white striped fabric. I hand stitched and pulled until I got the rosette look I was going for. Then glued the flower down with the end of the fabric running along the edge. At the corner I just folded and hot glued until I got the look I wanted.

5. Keep gluing your fabric down until you run out. Which in my case was too early. OOPS! I probably should have measured, but if you know me at all you know I don't measure anything. So instead of worrying about the huge space of missing fabric, I added some more flowers for fun :)


6. My husband came home and I proudly showed him my magnet board. He kindly asked why I stopped the fabric so early? haha I told him I had a plan...I did it on purpose?? Of course the answer is always a ruffle in my house so I added a ruffle and I actually like it better! Adds character right?

7. Here's the finished product! Even if I didn't have all of the stuff on hand I think this would only cost about $3. I love adding things to my home for next to nothing that serve a purpose.


Super cute and creative Camille! Love it
ReplyDeleteso cute!!! glad to see it finished, cause when you explained it, I thought you were crazy :) love it!
ReplyDeleteWow this is so awesome! You are so creative I love it!!!
ReplyDeleteDitto to what Kelley said. Way cute!
ReplyDeleteSO CUTE CAMILLE!!!!!!
ReplyDeleteLove this!! So cute with the trim and flowers! Now I need to go raid my home depot! :)
ReplyDeleteI Absolutely L-O-V-E this and might even have to try this one out myself awesome idea and to think I almost bought an ugly dry erase board, I think I have almost everything too, thank you for the adorable idea!
ReplyDeletecute project! thanks for sharing your idea. *visiting from tea rose home link party*
ReplyDeleteADORABLE!! i am so in love with those paint sticks.
ReplyDeletethanks for sharing!
lauryn @ lovenotesbylauryn.blogspot.com
I love the colors and the flower, very cute!
ReplyDeleteWhat a good idea! I never would have thought it was paint sticks! It turned out so cute!
ReplyDelete~Jessa
www.jessajill.blogspot.com
Cute.. like the color combination used and those flowers.
ReplyDeleteI am hosting my first Link-up party - Tea Time Thursdays. Would be glad to see some of your awesome posts there. Hope to see ya at the party :)
http://tanyaanurag.blogspot.com/2011/08/celebrating-one-party-time.html
Would you mind sharing where you bought the pre cut magnet board? Thanks!
ReplyDeleteThis is adorable! I never really thought about using paint stick for much...but now I will!
ReplyDeleteI LOVE THIS!!! I'm your newest follower!!
ReplyDeletegreat idea.
Thanks everyone! @Gretchen I found the pre-cut magnet board at Home Depot. I'm sure they have them at Lowes too!
ReplyDeleteSuper cute idea! Great job and thanks for sharing!
ReplyDeleteThis is one of the CUTEST magnet boards I've ever seen, amazing job! I'd love for you to link up at my Tuesday Tutorials link party! I'll be hosting one every Tuesday, the link is open now :) Hope to see you there!
ReplyDeletehttp://www.thekurtzcorner.com/2011/08/tuesday-tutorials-link-party-1.html
This is REALLY cute & creative! Good job!
ReplyDeleteOfficially on One Pretty Thing! You need a button!
ReplyDeleteCamille, I just found your blog. So cute! I love this magnet board, and since I don't have a crafty gene in me and have very little time. Can I buy one from you???
ReplyDeleteI love this!
ReplyDeleteBeautiful and functional!! Love it!
ReplyDeleteThis is adorable! The flowers add such a cute touch. I wanted to let you know I featured you this week! You can view the post here: http://designdininganddiapers.com/2012/02/top-10-tuesday-paint-sticks-arent-just-for-paint
ReplyDeletedarling....you are very agile in your craftiness! Go with the flow - do what you have to do to get her done! well done in this case! xo
ReplyDeletewww.NorthernCottage.net
Sorry I'm late to the game, I just found your project on Pinterest! Where did you find the precut metal sheet? I can only find 16x36 at Home Depot, which is way too big... Please email me when you have a moment!
ReplyDeletei did a art prject few days back and man it was fabolous. I bought my sticks from http://woodpaintsticks.com/wood-craft/ and i was happy with what i got.
ReplyDelete